
Tools required: -
2" Blue 6 petal blue woodware flower punch
Hi tack glue or similar (must be fast drying)
Pokey Tool or Similar
Pair of scissors
Plain or pattered paper for flowers.

First you will need to punch 3 flowers out of your chosen paper.

If you punch your flowers out of plain copier paper you can now decorate them with your choice of medium (I tend to use distress ink pads and just colour the outside edges) Of course if you use patterned paper they are already decorated so it is time to start making your flowers.
Firstly take one of your punched flowers and cut to the centre point of your flower making sure that you make the cut between your petals.

Take the second flower you have punched out and cutting to the centre point only cut out one petal. Then take last flower and cutting to the centre point again cut out 2 petals as in picture below.

DO NOT THROW ANY OF THE PARTS AWAY AS YOU WILL NEED THEM ALL.
Now go back to the first flower that you cut (The one with the cut to the centre) and stick one petal over the other so you now have a 5 Petal flower instead of a 6 petal flower. This will now be known as flower (a).

 |
| Flower (a) |

You will now have a 4 petal flower. This will now be known as flower (b).
 |
| Flower (b) |
 |
| Flower (c) |


Then take the the other half back across the other petal and glue into place.

This now should look like this and we will call it flower (d))
 |
| Flower (d) |
 |
| Flower (e) |

We will know start shaping and putting the flowers together
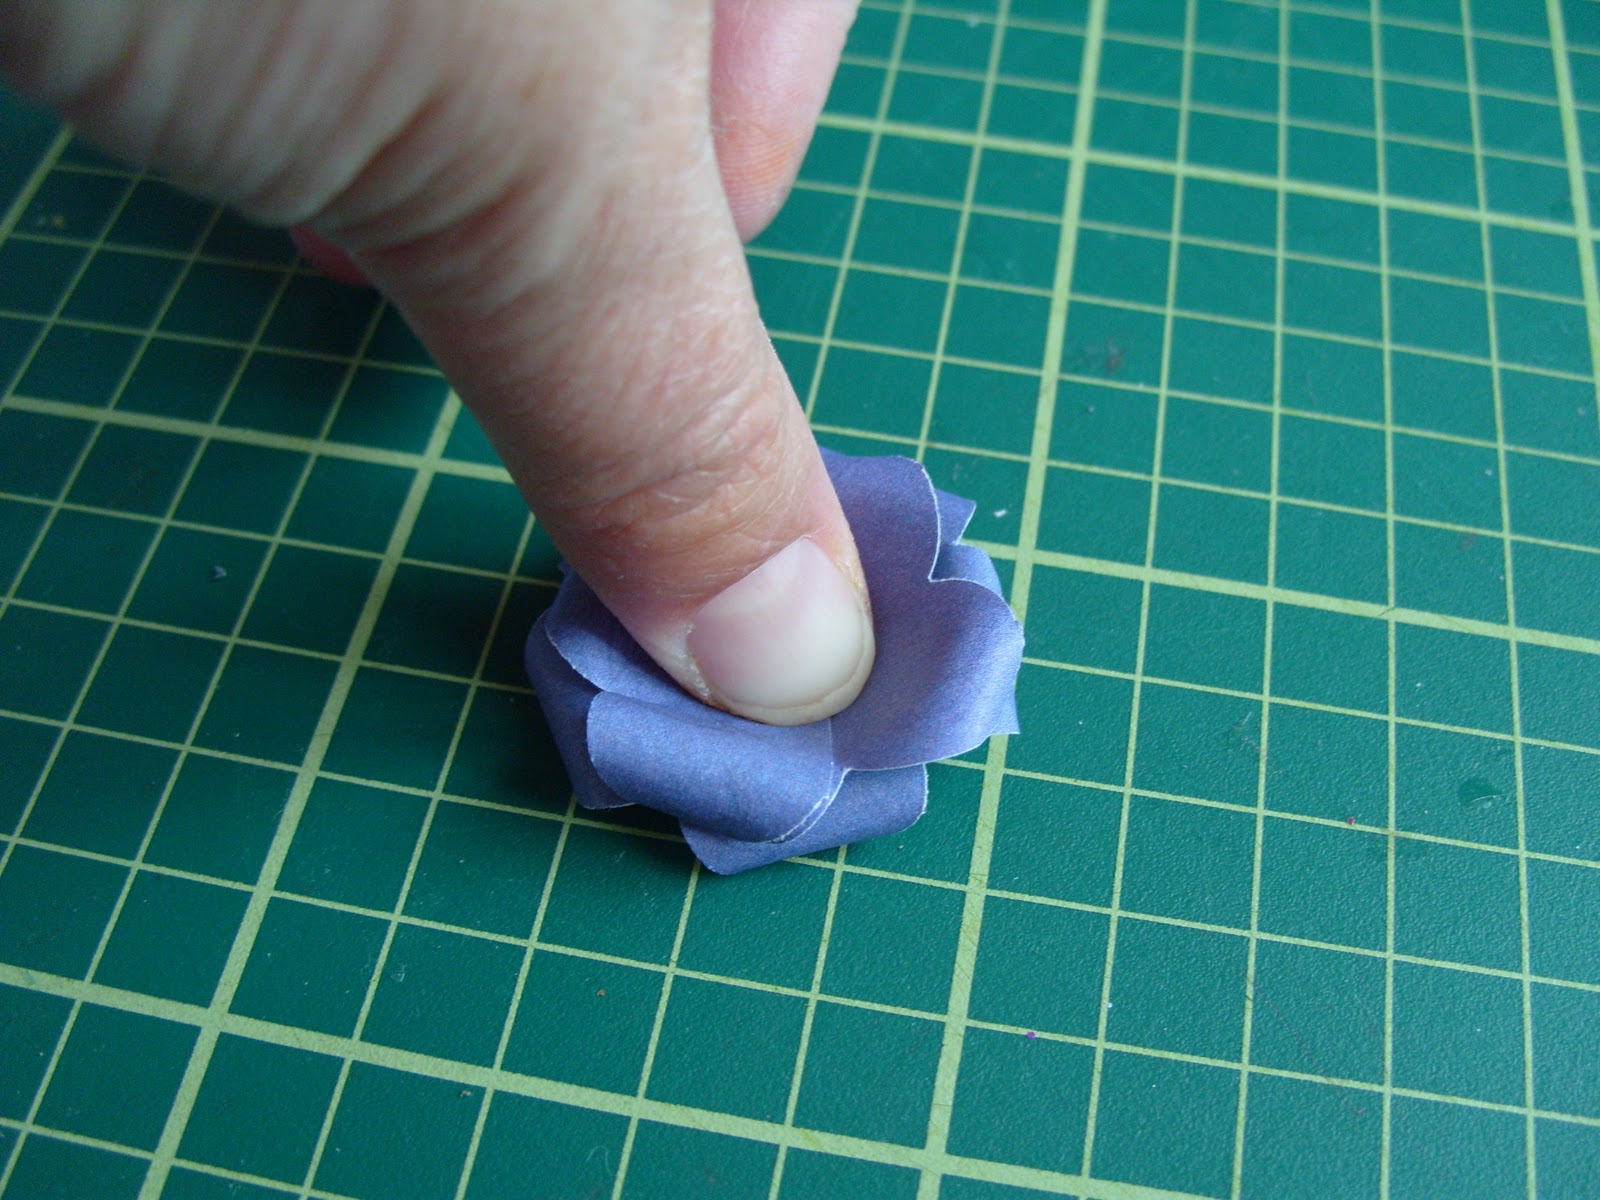
Take flower (a) and using your thumb push down on the centre of your flower to give it a flat bottom.


You will also need to do this for flower (b)


For the next three parts of the flower (c, d & e) you will need to cut about a 1/4 of and inch off the bottom of each part. See pictures below: -


You should now have pieces that look like this. See below: -

Now you can start shaping the petals. You only need to shape the petals on flower parts a, b & c, to do this take your pokey tool and bend each petal over the barrel of your pokey tool and roll petal over your pokey tool between thumb and finger as in picture below: -

Your flower parts now should look like this

Now you will need to put all your parts in order as below as all the intricate bits are now done you can now make you your flower. Please Do Not Be Tempted to put glue on all your flower parts at the same as you will get very messy. It is easier to do one part at a time but don't worry you do not have to wait for each part to dry to do the next.

Right to make up your flower put some glue into flower part (a)

Then press flower part (b) into glue remembering to offset the petals to the flower below.
Now take flower part (c) and a run the glue around the bottom of flower and stick it into the centre of the 4 petal flower, remembering again to offset the petals again.

Your flower should now look like this

Now take flower part (d) this is one of the parts you have not curled the petals on and like before put flue around the bottom of the flower and stick this into Flower piece (c).

Your flower should now look like this

Now using your glue squeeze some glue into the centre of the flower you have made so far and insert the last flower piece (e) into it.


Your flower should now look like this and it is now complete.

I hope this has been helpful to you and sorry it has been so ling winded but I do find a more detailed step by step guide helps and after you have made a couple of these they do become like second nature.
Enjoy making your flowers and happy crafting.
Lizzie


6 comments:
WOW what a fab flower tutorial...thanks for sharing with us xx Lizzy xx :)
Fab tutorial I must make some to these trouble is I don't think I have the right punch... typical !!
Excellent tutorial and gorgeous flowers thanks for sharing these with us. Teresa xx
Fabulous tutorial,thankyou for sharing,
Hugs Dianne xx
WOW WOW WOW! Will give it a try someday :) Thanks for sharing!
ooo thank you for the link and well done the tutorial is just great ... thank you for sharing it with me and if and when I ever get mine done I will let you know ... happy crafting Sandy xx
Post a Comment