Followers

Wednesday, 18 August 2010

Flower Tutorial

Well as promised here is how I have made my flowers that I have displayed on docrafts.

Tools required: -

2" Blue 6 petal blue woodware flower punch
Hi tack glue or similar (must be fast drying)
Pokey Tool or Similar
Pair of scissors
Plain or pattered paper for flowers.


First you will need to punch 3 flowers out of your chosen paper.


If you punch your flowers out of plain copier paper you can now decorate them with your choice of medium (I tend to use distress ink pads and just colour the outside edges)  Of course if you use patterned paper they are already decorated so it is time to start making your flowers.

Firstly take one of your punched flowers and cut to the centre point of your flower making sure that you make the cut between your petals.


Take the second flower you have punched out and cutting to the centre point only cut out one petal.  Then take last flower and cutting to the centre point again cut out 2 petals as in picture below.


DO NOT THROW ANY OF THE PARTS AWAY AS YOU WILL NEED THEM ALL.


Now go back to the first flower that you cut (The one with the cut to the centre) and stick one petal over the other so you now have a 5 Petal flower instead of a 6 petal flower.  This will now be known as flower (a).


Flower (a)
Now take the larger piece of the second flower apply glue and stick one petal over the other so that you have no gap.


You will now have a 4 petal flower.  This will now be known as flower (b).

Flower (b)
Now take the part of the 3rd flower that looks like a butterfly and once again apply your glue to one of the petals next to the gap and close the flower so you do not have a gap.  You should now have a 3 petal flower. This will now be known as flower (c)

Flower (c)
Right now for the last 2 parts of the basic flower.  Take the piece of the flower that is left that looks like a heart and fold one petal 1/2 way over the second petal as below: -


Then take the the other half back across the other petal and glue into place.


This now should look like this and we will call it flower (d))

Flower (d)
You should now be left with the single petal that you cut out of flower 2 and this part can be the most fiddly.  This petal need to be rolled upon itself and glued into place so that it looks like a small cone shape.  This will be known as flower (e).

Flower (e)
You now should have flower parts that look like this: -


We will know start shaping and putting the flowers together

Take flower (a) and using your thumb push down on the centre of your flower to give it a flat bottom.


You will also need to do this for flower (b)


For the next three parts of the flower (c, d & e) you will need to cut about a 1/4 of and inch off the bottom of each part.  See pictures below: -


You should now have pieces that look like this.  See below: -


Now you can start shaping the petals.  You only need to shape the petals on flower parts a, b & c, to do this take your pokey tool and bend each petal over the barrel of your pokey tool and roll petal over your pokey tool between thumb and finger as in picture below: -


Your flower parts now should look like this


Now you will need to put all your parts in order as below as all the intricate bits are now done you can now make you your flower.  Please Do Not Be Tempted to put glue on all your flower parts at the same as you will get very messy.  It is easier to do one part at a time but don't worry you do not have to wait for each part to dry to do the next.


Right to make up your flower put some glue into flower part (a)


Then press flower part (b) into glue remembering to offset the petals to the flower below.
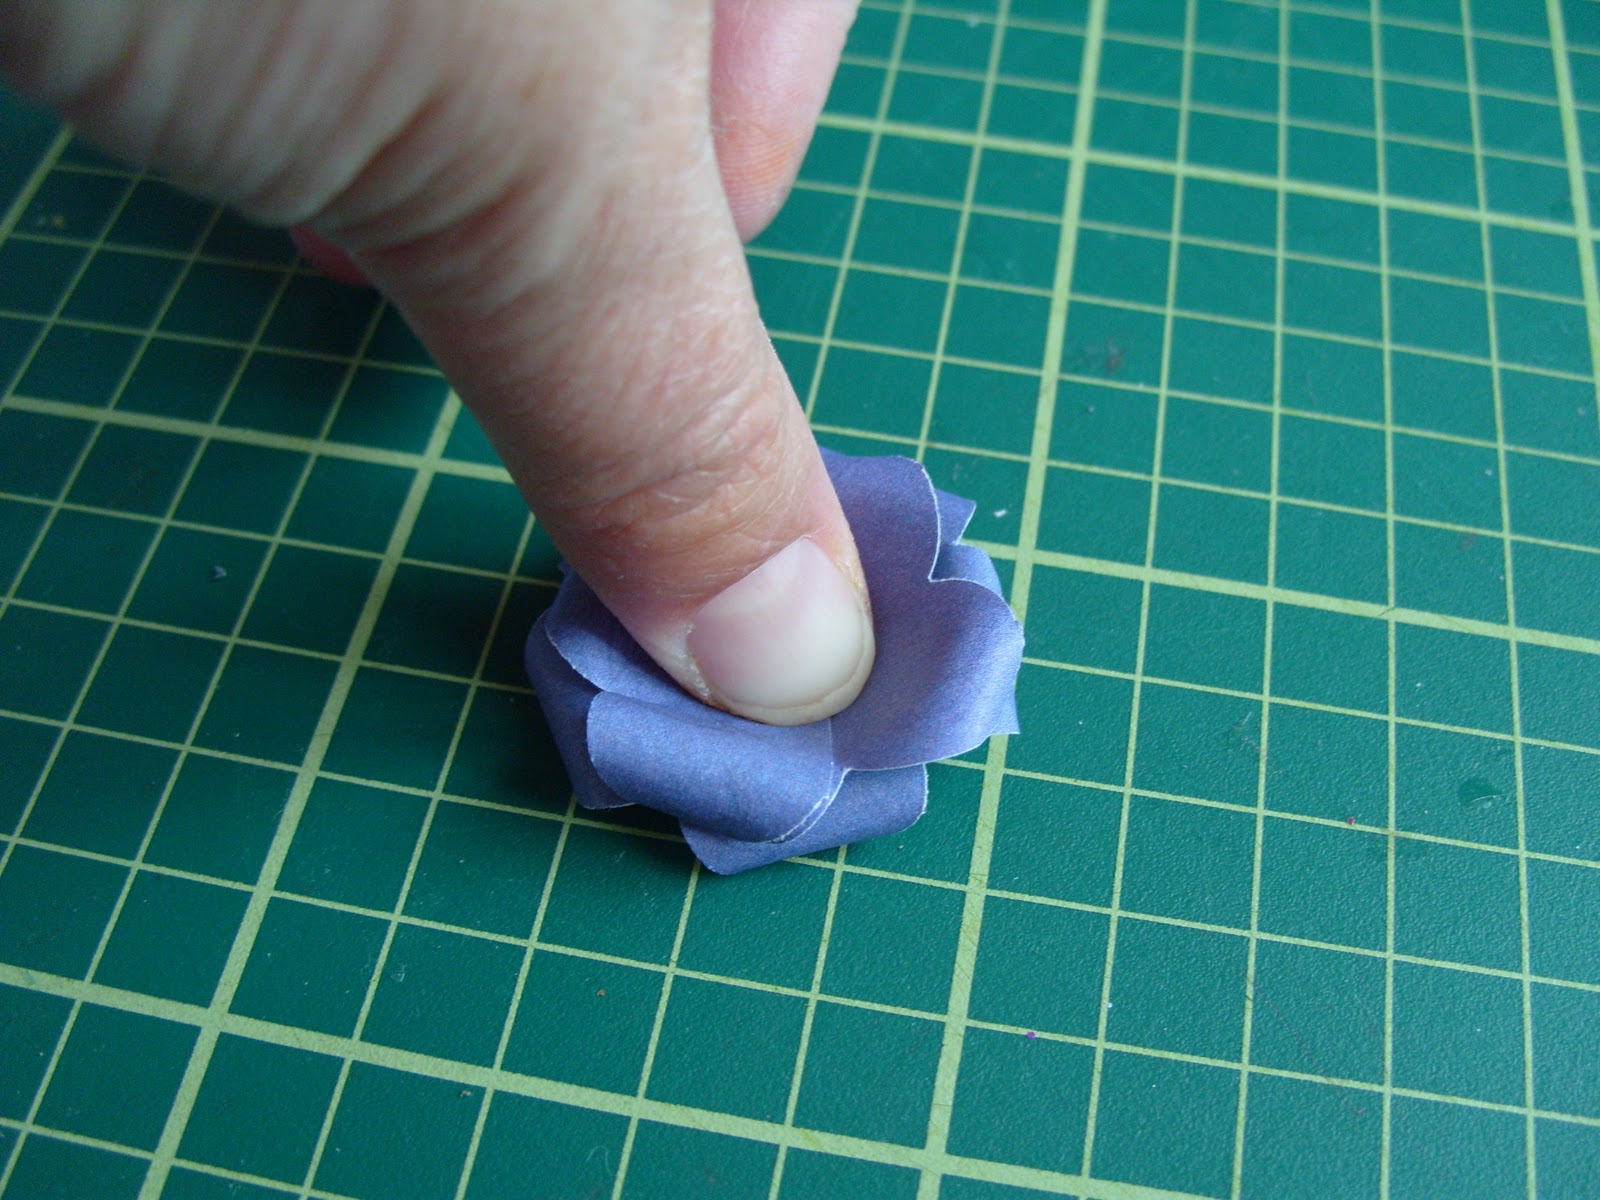

Now take flower part (c) and a run the glue around the bottom of flower and stick it into the centre of the 4 petal flower, remembering again to offset the petals again.


Your flower should now look like this


Now take flower part (d) this is one of the parts you have not curled the petals on and like before put flue around the bottom of the flower and stick this into Flower piece (c).


Your flower should now look like this


Now using your glue squeeze some glue into the centre of the flower you have made so far and insert the last flower piece (e) into it.


Your flower should now look like this and it is now complete.


I hope this has been helpful to you and sorry it has been so ling winded but I do find a more detailed step by step guide helps and after you have made a couple of these they do become like second nature.

Enjoy making your flowers and happy crafting.

Lizzie

Thursday, 29 July 2010

Penny Black Saturday Challenge


Morning, well lit seems i am burning the midnight oil.  Here is my entry into this weeks challenge "Its Christmas in July"


.

The image is from the Jolly Follies clear set of stamps which has been coloured in with my promarkers


 The card is from my stash and the punches used are the new Martha Stewart christmas ones.


Also the greeting is one i dug out of my stash so i am unsure of where it comes from.

Thank you for looking and for any comments you may like to leave.

Happy Crafting

Lizzie

Wednesday, 28 July 2010

Sugar Nellie Challenge 39


Here is my entry for this weeks challenge.

The image used is Where's Mine and coloured with my promarkers, papers are from this months creative card making magazine, card from stash and card candy from craft work cards.

Thank you for looking and for any comments you may like to leave.

Happy crafting

Lizzie

LOTV Challenge No 58

Afternoon Everyone

This is my entry for this week LOTV challenge.  The card size i have used is 14.5cm square, so it fits in a 15cm square envelope.


The image i have used is called All Wrapped Up and is one of the new ones from LOTV.  I have coloured the image with my promarkers


Card was from a card pack i bought from Lidl 270gram weight very good value for money at £1.99 for 25 different colours of card.  It is larger than A4 but smaller than A3 so plenty of offcuts for matting and layering.  The paper was a freebie in one of the card making magazines from last year.

.
The snow flakes have been punched in both white and silver card and layered on top of each other.  I used one of the x-cut punches that i purchased a couple of years ago.


Card candy and sentiment from craft work cards.


Thank you for looking and for any comments you may like to leave as they are always appreciated.

Happy crafting

Lizzie

Thursday, 22 July 2010

My Daughters 5th Birthday Card

This is the card i have made for Vicky's 5th Birthday, needless to say that she absolutely loved it.


Image used is from Lili of the Valley and it is called Mirror Mirror, card and peel offs from stash.

Thank you for looking and for any comments you may like to leave.

Happy Crafting

Lizzie

Saturday, 12 June 2010

Final Tilda card for a while

This is my last one for a while.  I need to use some of my other stamps so watch this space and i will see what i can come up with.


Thank  you for looking and for any comments you may like to leave.

Lizzie

Magnolia challenge card

This is my entry for this weeks challenge.  I hope i have done it justice.


Stamp- Princess Tilda
Papers and Flowers - From Stash
Image - Coloured in with promarkers.

Thank you for looking and for any comments you may like to leave.

Lizzie

Friday, 11 June 2010

Saturday Challenge Card

This is my entry for this weeks challenge.


It is and easel card so below is the front of the card


Stamp - Princess Tilda by Magnolia
Papers - Forever Friends
Brads - Card Candy from craftwork cards
Flowers and everything else from stash
Image coloured with promarkers.

Thank you for looking and for any comments you may like to leave.

Happy Crafting

Lizzie

A Few tilda cards made with Princess Tilda

Here are some Tilda cards i have made over the past few days.  Although i have used the same image i have tried to do a different layout for each card.

Blue Tilda


Pink Tilda


Orange Tilda


Thank you for looking and for any comments you may like to leave.

Happy Crafting

Lizzie

Wednesday, 26 May 2010

Girls Birthday card

Just a quick post from me this is a birthday card made for my daughters friend


Thank you for looking and for any comments you may like to leave.

Lizzie